
Hydro dip training
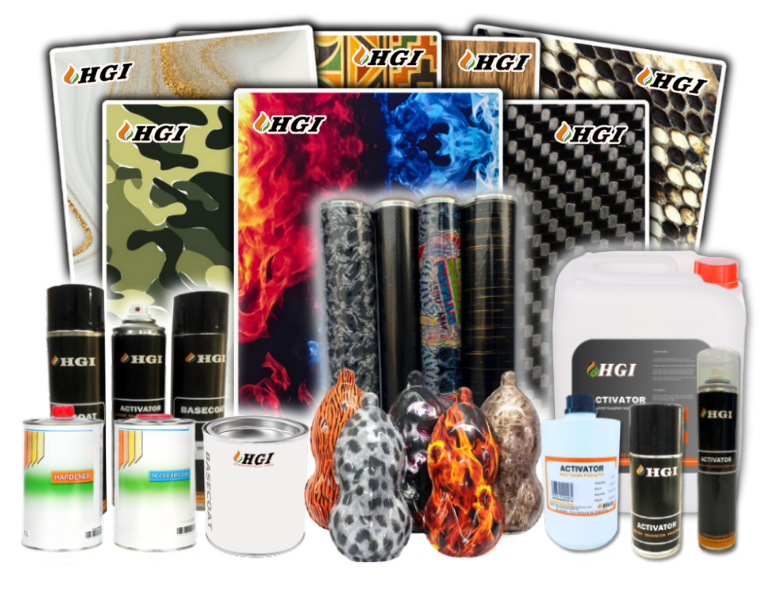
Welcome to HGI
Welcome to our Hydro Dip Training Program, where we're not just dipping objects – we're dipping into a pool of knowledge and expertise. Whether you're a curious beginner or an experienced professional looking to refine your skills, our comprehensive training will immerse you in the art and science of hydrographic printing.
COURSE MODULES
A comprehensive 2-Day intensive program covering every aspect of the process.
PREPARATION
Master the art of surface prepping. Sanding, degreasing, and priming for different materials.
- Plastic vs Metal Prep✔
- Basecoat Application✔
PRIMER
The science of chemical activation. Learn gun settings, spray patterns, and timing.
- Activator Chemistry✔
- Spray Gun Tuning✔
DIPPING
Hands-on dipping practice. Learn angles, speed, and how to avoid air bubbles.
- 30-45 Degree Entry✔
- Complex Shapes✔
FINISHING
Post-dip processing. Rinsing techniques, drying, and applying the final clear coat.
- Rinsing Protocol✔
- Gloss vs Matte✔
STUDENT WORK


BOOK YOUR SLOT
Training held at our Faridabad HQ. Includes all materials.
DIY STARTER
- ✔ 1 Day Crash Course
- ✔ Basics of Dipping
- ✔ 5 Practice Dips
- ✔ Certificate of Completion
PRO MASTER
- ✔ 2 Days Intensive
- ✔ Advanced Techniques
- ✔ Unlimited Practice
- ✔ Machine Operation
- ✔Business Setup Guide
Overview Of The Training Program
Begin your hydro dip journey with an overview of the training program. Discover the exciting world of hydrographics and what you can expect from our comprehensive training.
Introduction to Hydrographics:
Dive into the basics of hydrographics – what it is, how it works, and its applications across industries. Get ready to unravel the magic behind water transfer printing.
- Key concepts and terminology in hydrographics
- Overview of the hydrographic printing process
Preparation and Object Handling
Learn the art of preparing objects for dipping, ensuring proper adhesion, and handling items with care to achieve flawless results.
- Surface preparation and priming techniques
- Applying correct base coat for optimal adhesion
Clear Coating and Finishing
Discover the importance of clear coats in protecting and enhancing your hydrographic designs. Master techniques for applying a smooth, durable finish.
- Applying clear coats for protection of component
- Achieving a glossy and professional finish
Understanding Equipment and Materials:
Explore the essential tools, equipment, and materials required for successful hydro dipping. From tanks to films, activators to clear coats, you'll become familiar with the entire toolkit.
- Introduction to water transfer printing equipment
- Hands-on equipment setup and calibration
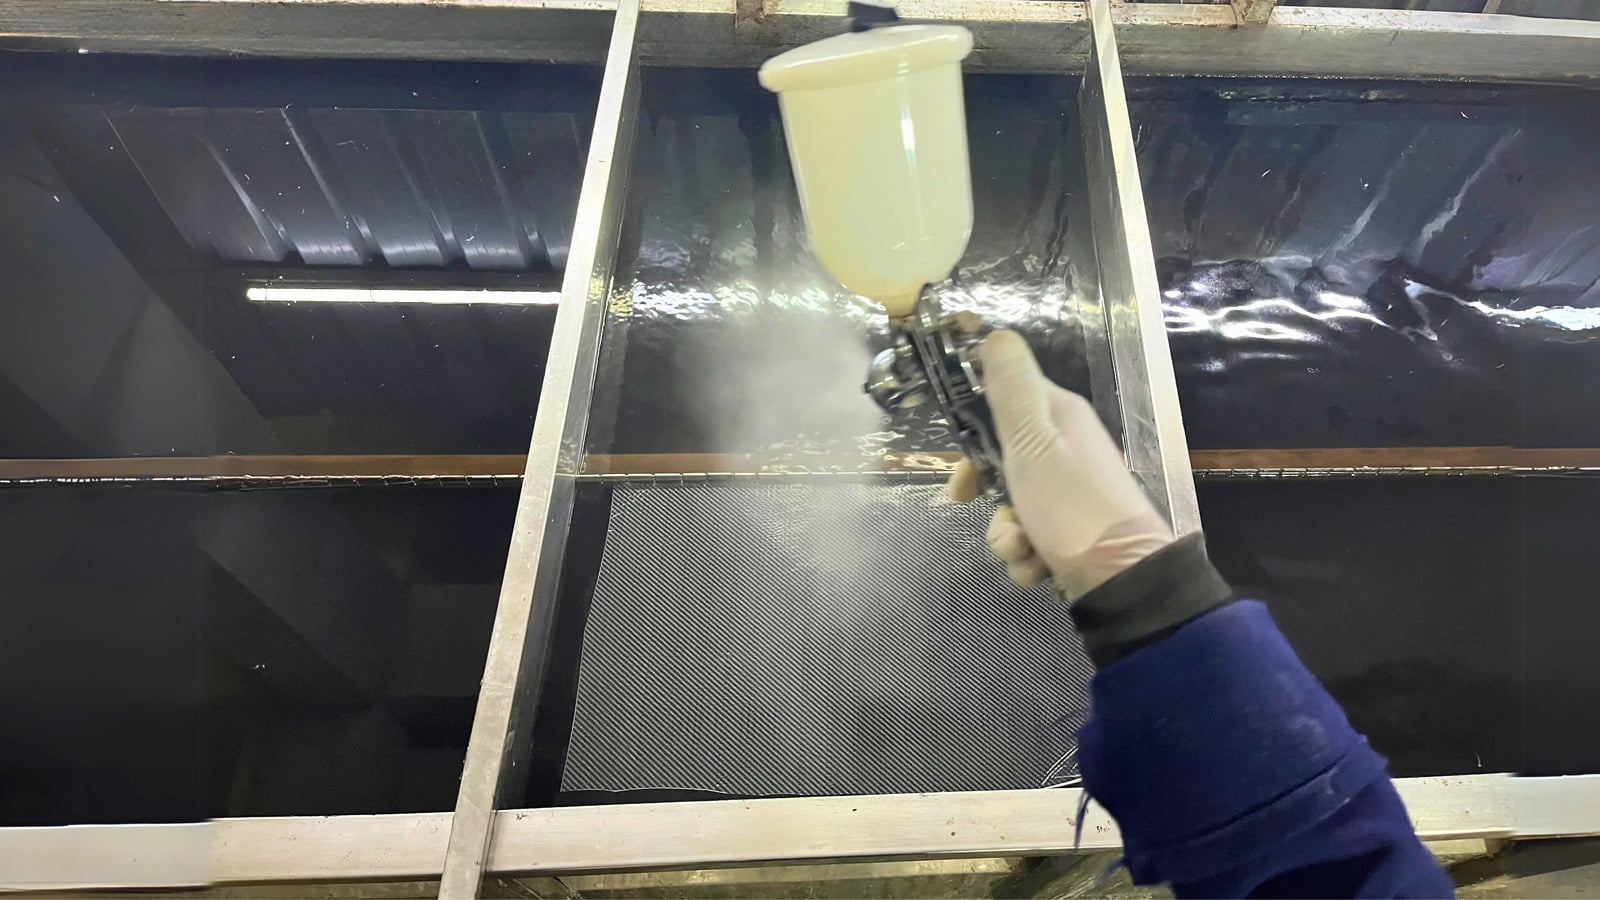
Activating and Dipping
Get hands-on with the activation process, understanding the role of activator solutions and how to execute a perfect dip every time.
- Proper film placement in water and alignment
- Techniques for activating the film effectively
How Do I Apply Hydro Dipping Films ?
By following these detailed steps, you can successfully apply HGI hydro dip film to decorate a wide range of objects, creating custom designs that are vibrant, durable, and visually appealing. Whether you're personalising automotive parts, sporting goods, electronics, or household items, hydro dipping offers endless possibilities for creative expression and customisation. With practice and attention to detail, you can achieve professional-quality results that are sure to impress.personalising automotive parts, sporting goods, electronics, or household items, hydro dipping offers endless possibilities for creative expression and customisation. With practice and attention to detail, you can achieve professional-quality results that are sure to impress.personalising automotive parts, sporting goods, electronics, or household items, hydro dipping offers endless possibilities for creative expression and customisation. With practice and attention to detail, you can achieve professional-quality results that are sure to impress.
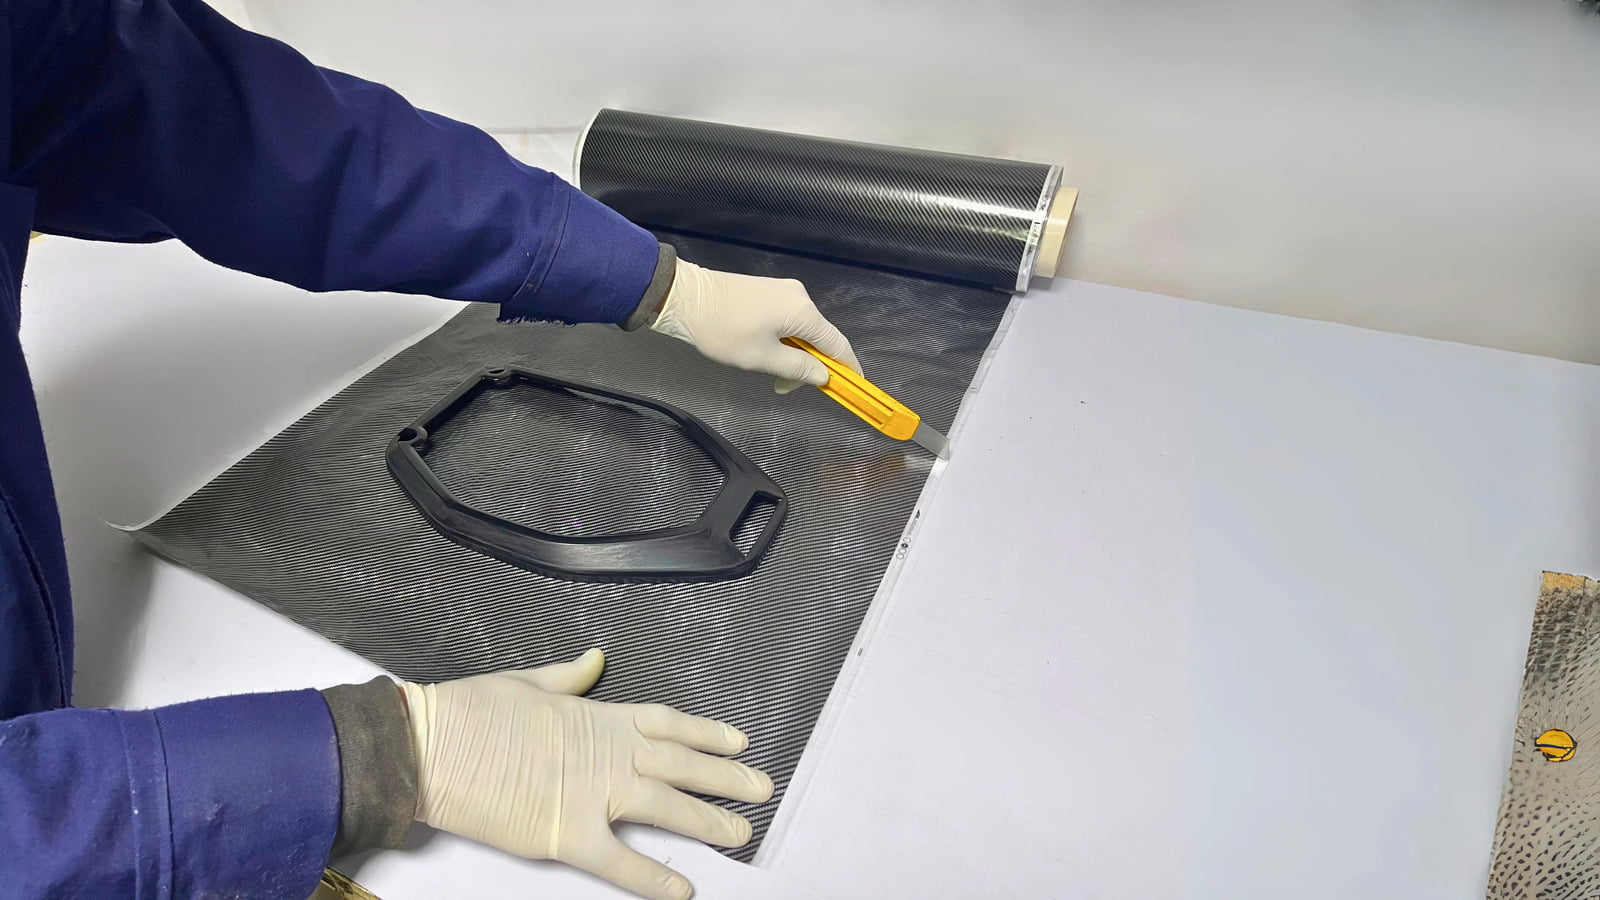
Prepare The Film
Carefully cut the hydro dip film to the appropriate size, ensuring that it is slightly larger than the object you plan to dip. This extra margin will allow for easier handling and alignment of the film during the dipping process.
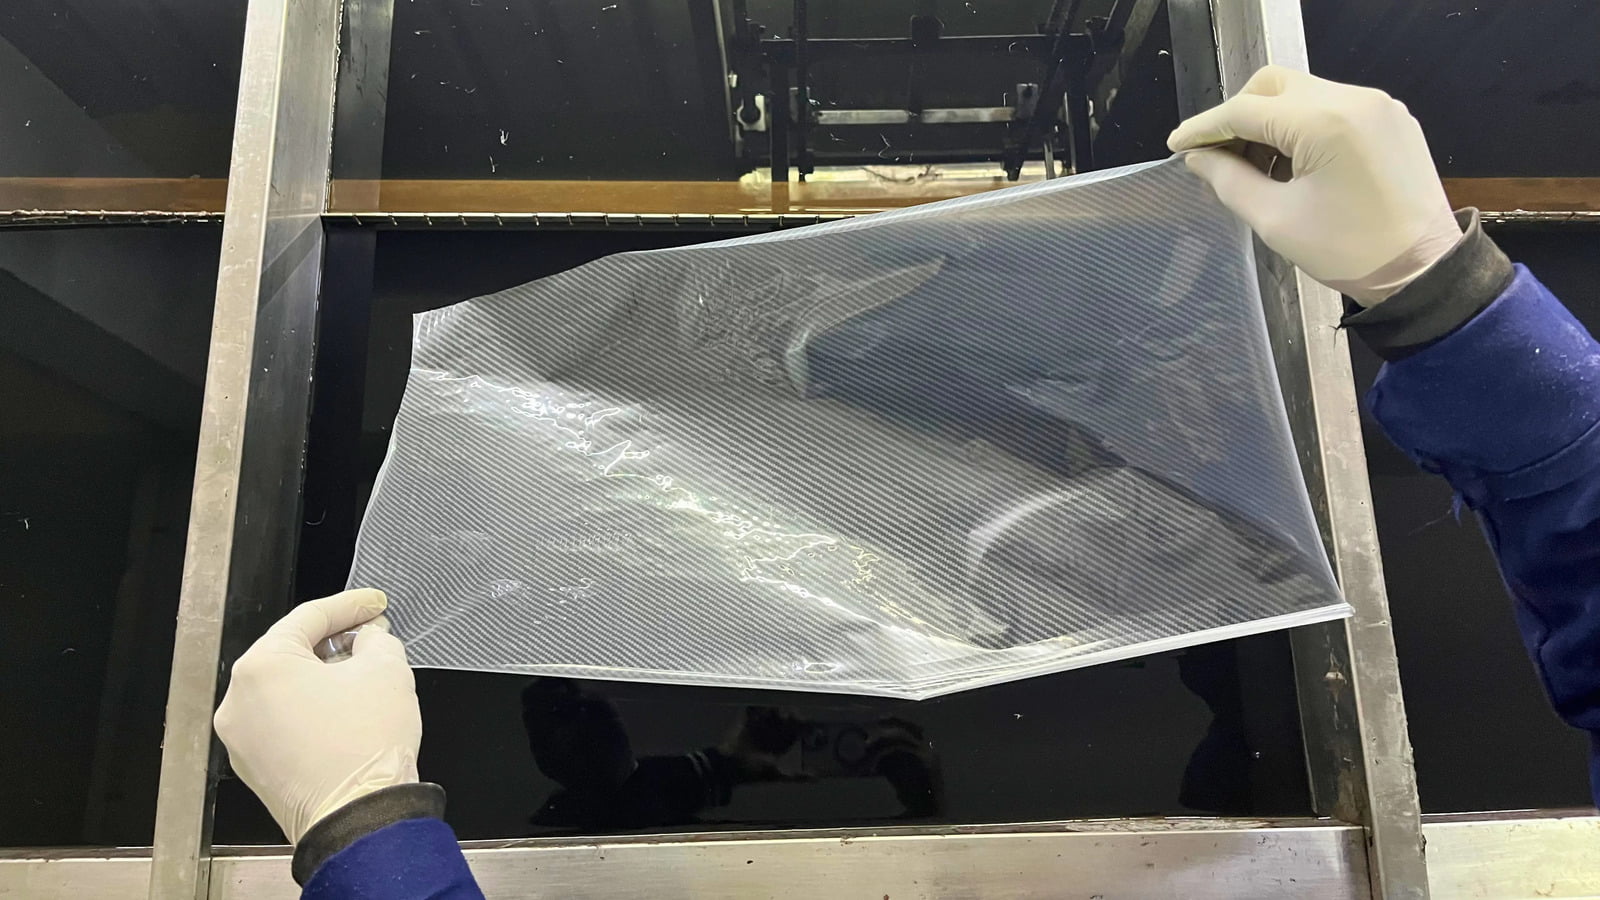
Laying Film In Water
Lay the film flat on a clean, dry surface, taking care to avoid any wrinkles or creases that could affect the appearance of the final design. Properly preparing the hydro dip film ensures that it is ready for activation and application to the object.

Prepare For Film Activation
Use HGI film activator and directly fill the activator in your spray gun
Activate The Film
Activate The Film
Before applying the hydro dip film to the object, it must be activated using a chemical solution known as a hydro dip activator.
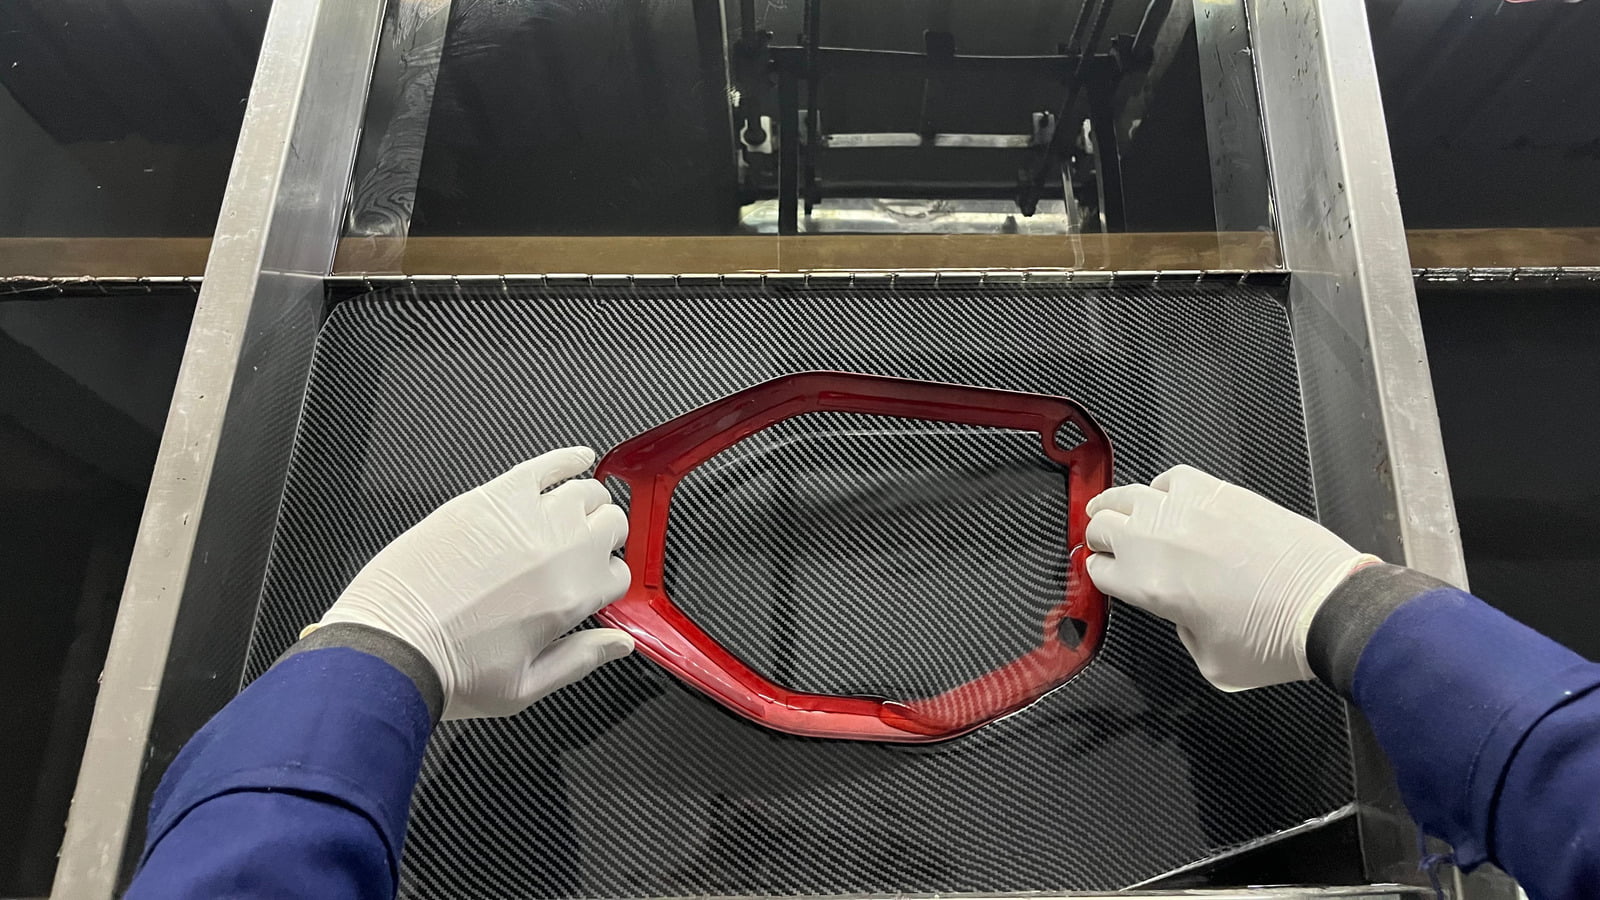
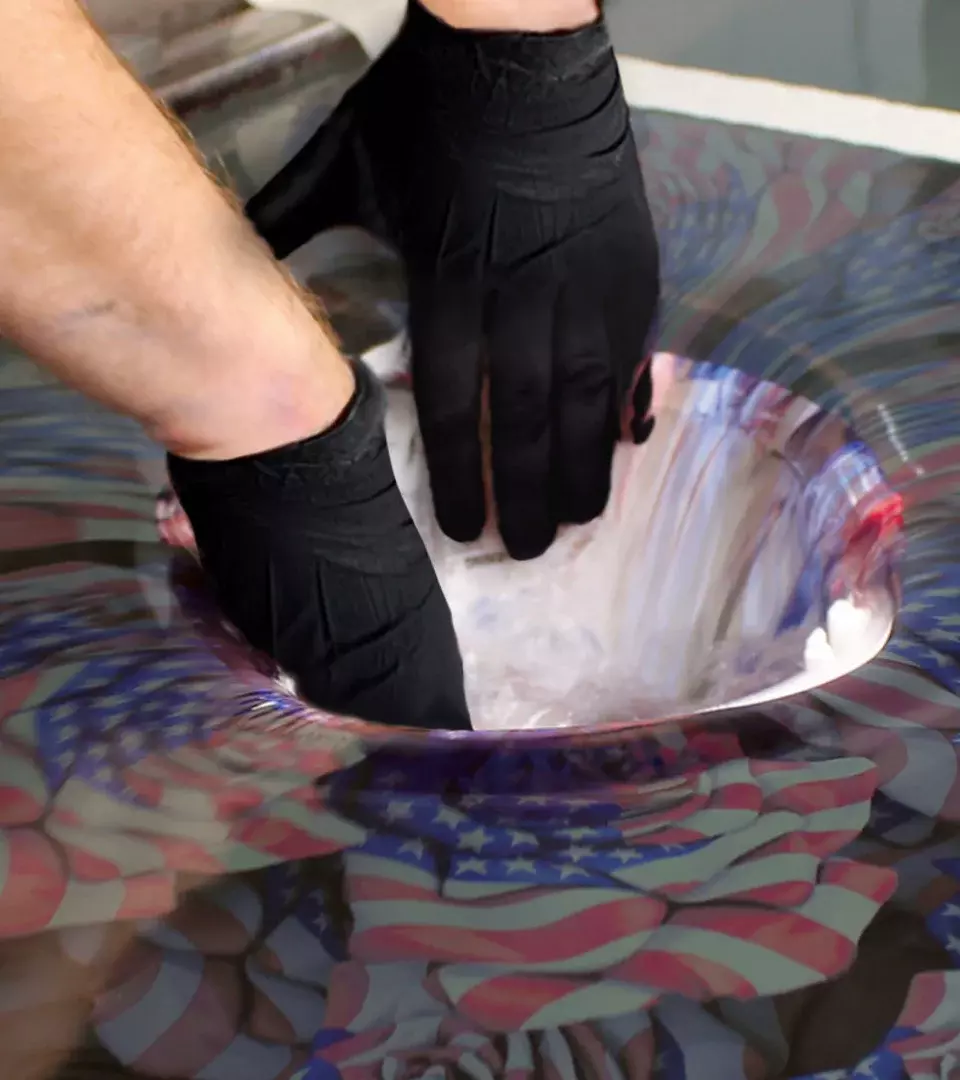
Dipping The Object
Once the film is in place, quickly and evenly submerge the object into the water, allowing the film to wrap around its surface. Use gentle, fluid motions to ensure that the film adheres evenly to all areas of the object.
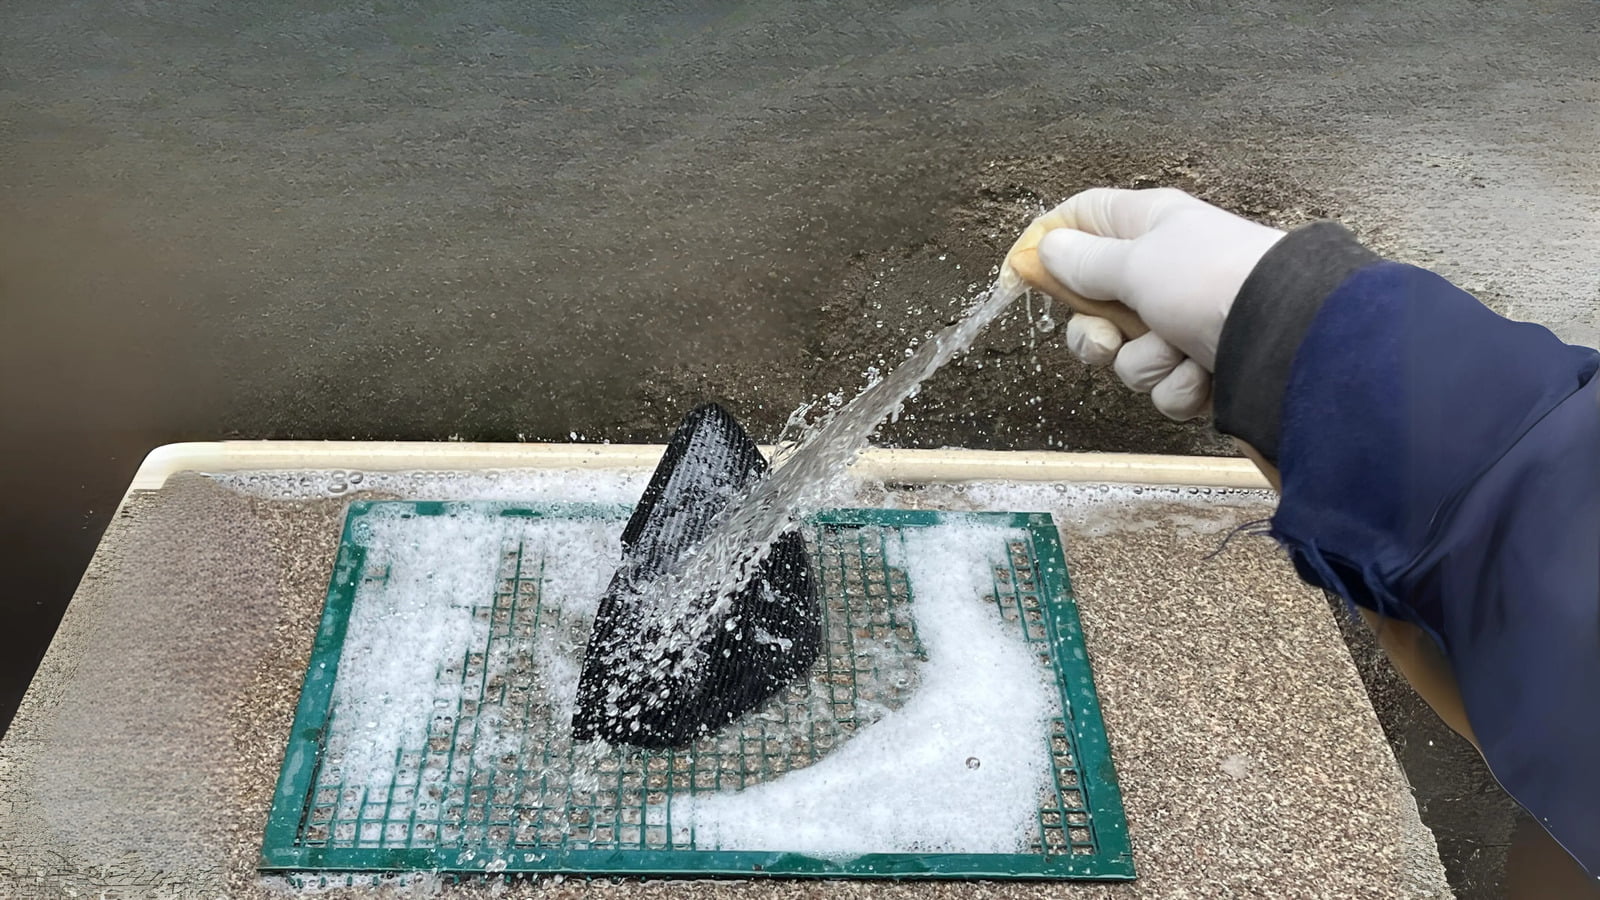
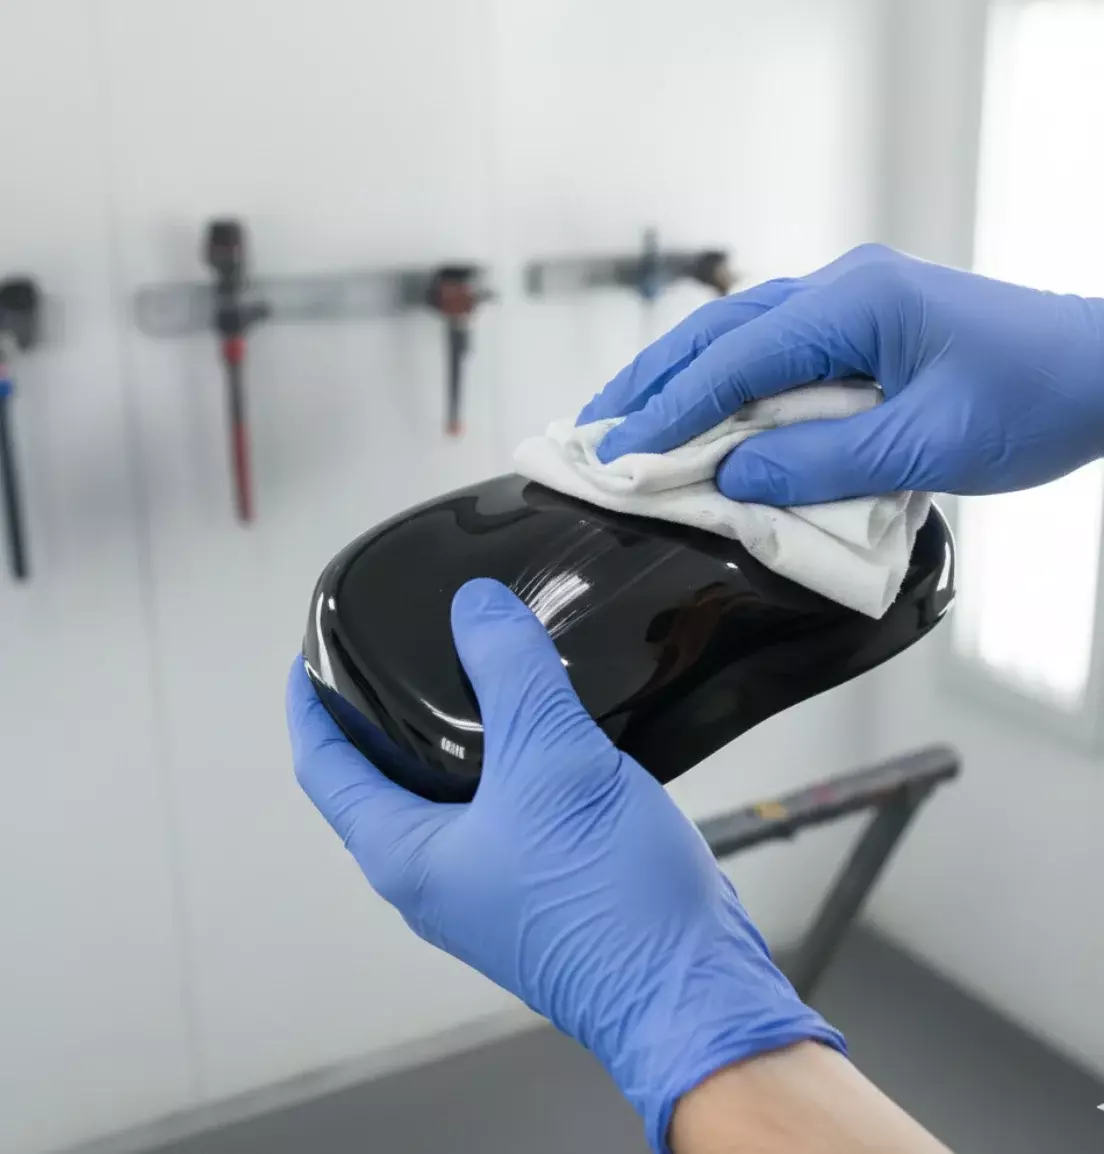
Rinse The Object
Rinse The Object
After dipping the object, carefully remove it from the water and rinse it thoroughly with clean, fresh water to remove any excess film residue. This step helps to ensure that the final finish is clean and free of any leftover chemicals or debris from the dipping process.

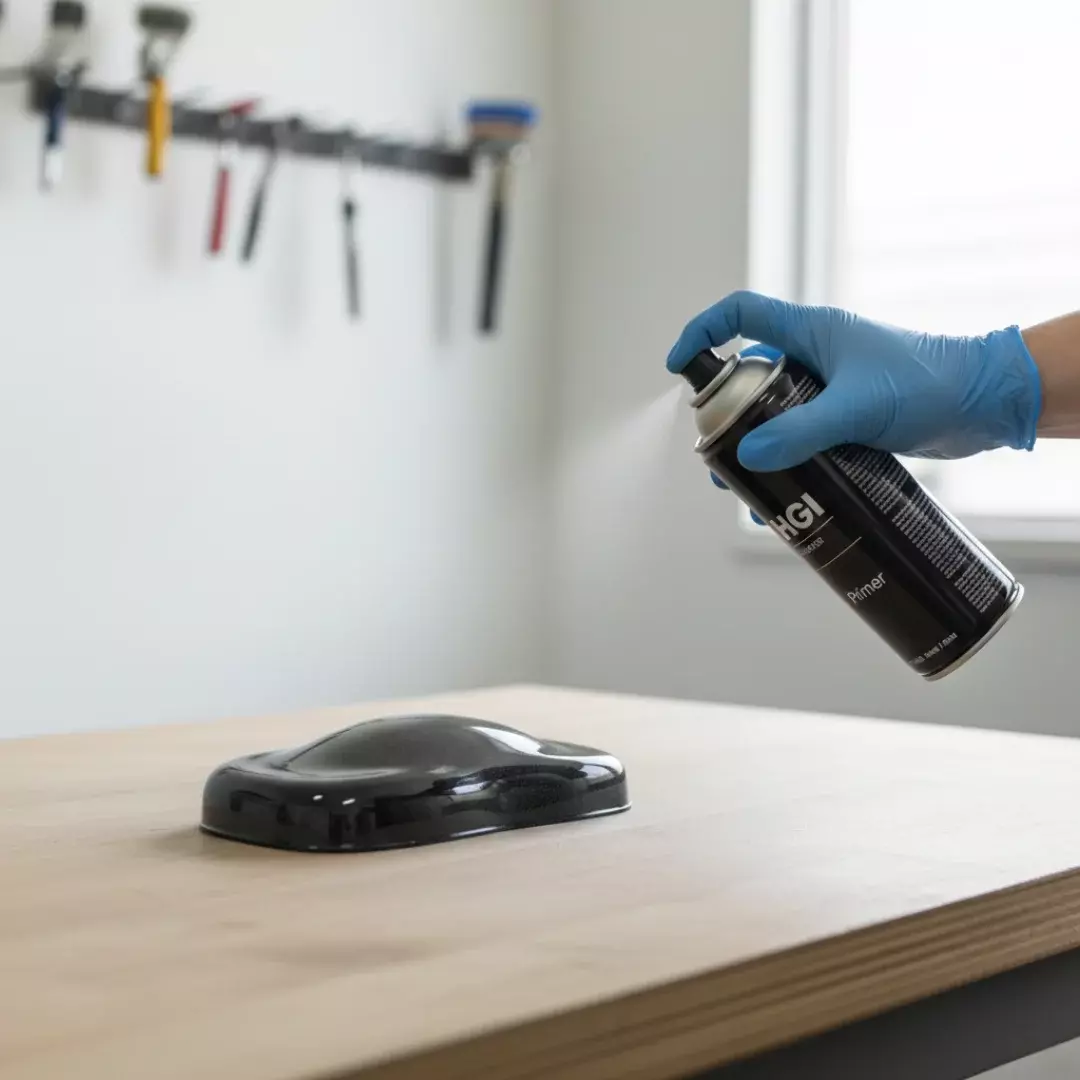
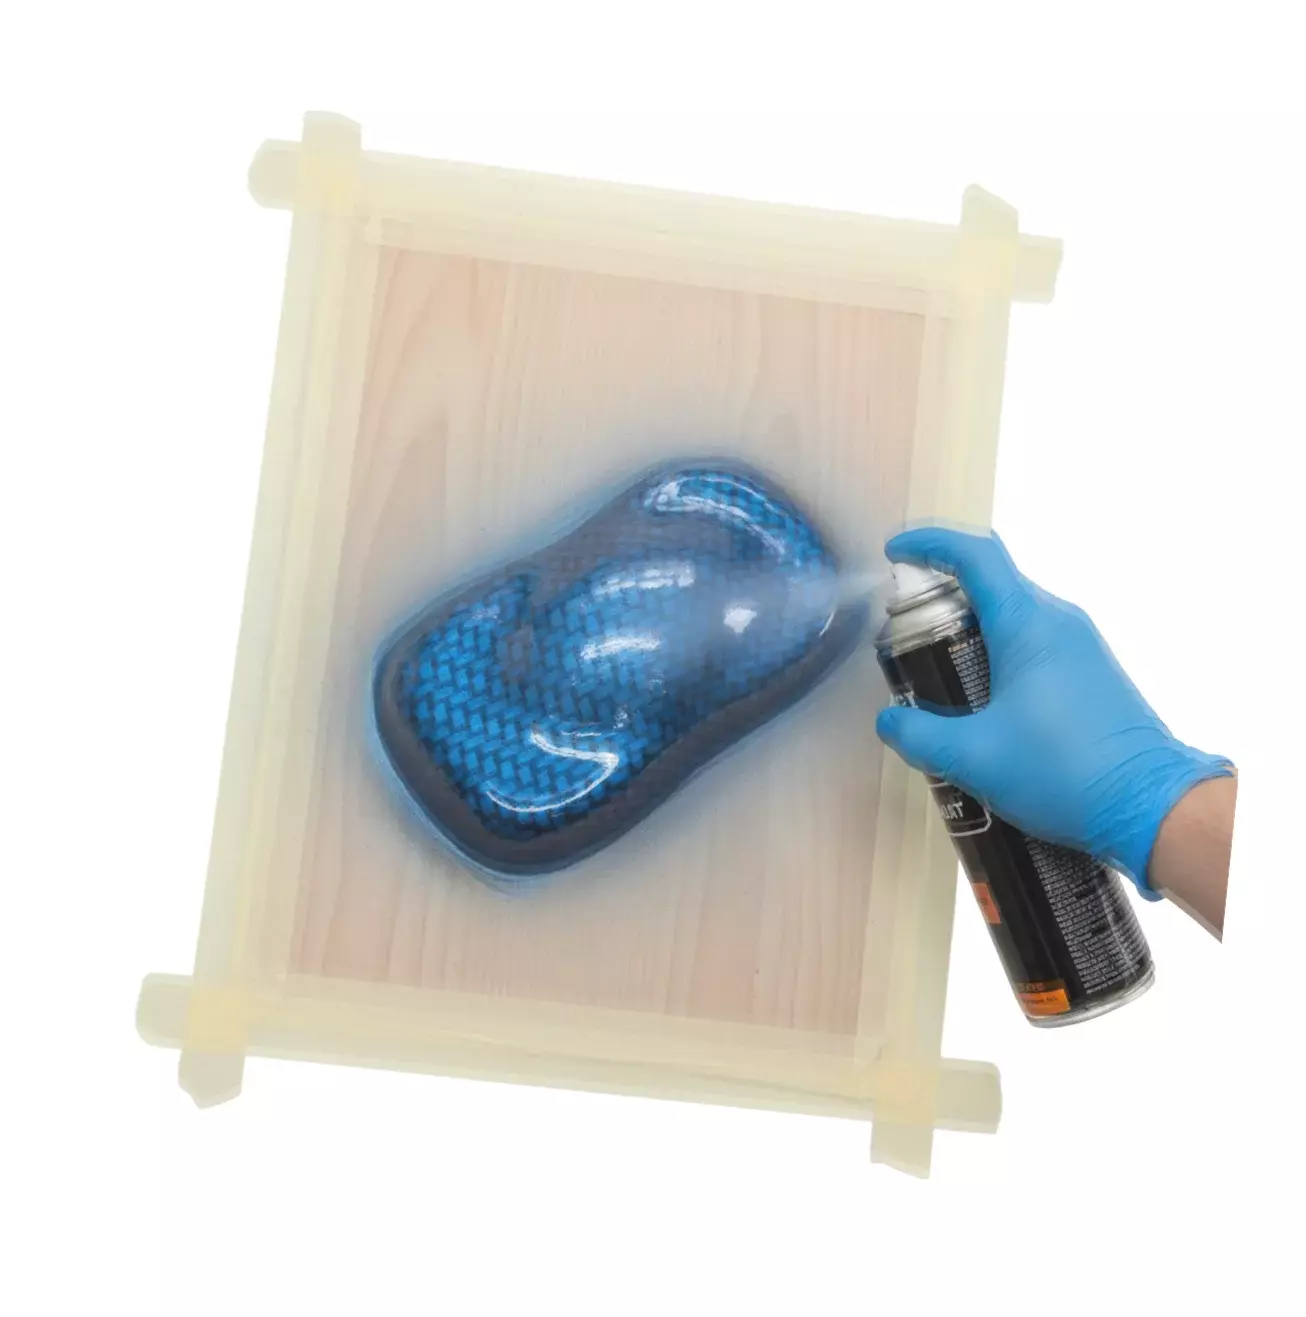
Apply Clear Coat
Apply Clear Coat
For added protection and a glossy finish, consider applying a clear coat sealant to the object once it has dried completely. This clear coat helps to seal and protect the printed design from scratches, fading, and other damage, extending the life of the finished product.
Book your training today
- Expert Instructors: Learn from experienced hydrographic professionals who are passionate about sharing their knowledge.
- Hands-On Experience: Our training is designed to offer plenty of practical, hands-on sessions to build your confidence.
- Supportive Community: Join a network of hydrographic enthusiasts, share ideas, and seek guidance beyond the training program.
- Continuous Learning: Hydrographics is an evolving field. Our training equips you with the skills to adapt and stay at the forefront of the industry
Why Choose Our Training